Monday, September 22, 2014

#BookWorm: The Wedding

Hey fellow readers!

I finally finished another book! With the NCLEX in my past, I started leisurely reading again. I am working on my list, and The Wedding was the next one up so I decided to give it a whirl. I cannot tell you how shocked I was that I actually really enjoyed this book. Why was I so shocked you may ask? Because it's a sequel to a Nicholas Sparks classic The Notebook. If you HAVEN'T read The Notebook or don't know that the ending is different from the movie, stop reading here because this is a major spoiler alert.

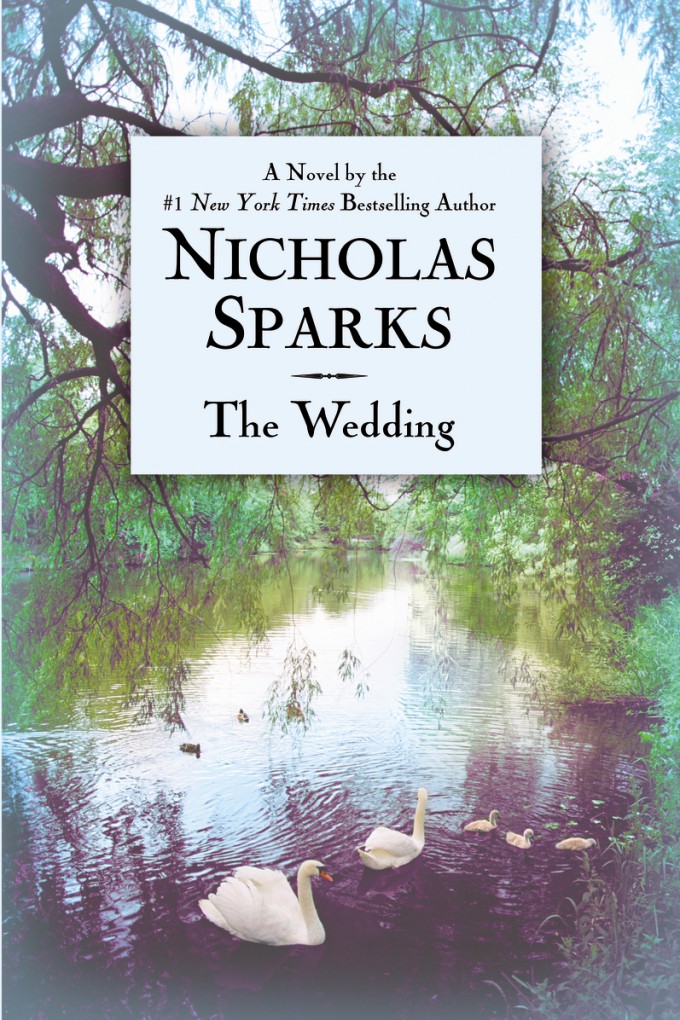
The Wedding is about Noah's granddaughter who is getting married and the preparations for her wedding. It is a middle aged male perspective the entire book, Noah's son-in-law Wilson, and a majority of the story takes place in the present when they're middle aged. Typically I like books about younger couples and from a female perspective, but this one was great. I was worried it would ruin my thoughts on The Notebook, but it didn't. I loved Noah and his relationship with the swan in the book, and loved that they included a lot of flashback moments from Noah and Allie's crazy relationship. Overall I would give the book a 9/10, yeah that good. Which is odd since normally I like the female perspective (like in my review of Dear John I kind of bashed him for not including more female perspective), but I honestly didn't miss it in this book. I was impressed. Again, if you hate romance stories and/or Nicholas Sparks, first of all you're cray, second of all you won't like this book.

Also did anyone else see how they changed all the old Nicholas Sparks covers to pictures of couples? Like what the heck? I hate hate hate the new covers. So annoying. Google it, you'll be angry too if you're a Sparks fan.

I started reading Four by Veronica Roth, which is a collection of stories from the view of Tobias. I will let you all know when I finish, but so far so good. So what are you reading these days? Has your list expanded? Let me know!

Thanks for reading,
Olivia

Friday, September 19, 2014

DIY: Pumpkin Chocolate Chip Cookies

Hey everyone!
This week I had some free time since I am starting my big girl real world job next week. I decided to experiment with some pumpkin baking since it is officially Fall! I decided to try Pumpkin Chocolate Chip Cookies based off of a recipe I found on Pinterest, but I changed it a little bit. What you'll need: 1/2 cup butter (I used I Can't Believe It's Not Butter) melted, 3/4 cup brown sugar, 1/4 cup granulated white sugar (or confectionary sugar if you don't have granulated, 1 1/4 teaspoon vanilla extract, 5-6 tablespoons of pumpkin puree, 1 and 3/4 cups all purpose flour, 1/4 teaspoon salt,1/2 teaspoon baking powder, 2 teaspoons ground cinnamon, 1/4 teaspoon ground nutmeg, 1/8 teaspoon gound cloves (estimate here), and as many chocolate chips as you think. 

Mix all the ingredients minus the chocolate chips. Let them cool in the fridge, I did for about 2 hours, but you can anywhere from 30 minutes to 3 hours. Preheat the oven to 350 degrees. After that add in the chocolate chips using a soft spatula. TIP: For easier to work with dough, freeze for 30 minutes after cooling for an hour. Form the cookies into as round of a shape as you can on the baking sheet. The pumpkin is hard to work with so be prepared to get your hands a little dirty. With the ingredients above you can expect about twenty small cookies or twelve large cookies. TIP: Don't forget to spray the pan, these cookies are really sticky! Bake them for 8-10 minutes. Let cool on counter for an hour and then place in covered container in the fridge for two hours for better taste. TIP: If you're using a top and bottom rack, after four minutes switch the bottom cookie sheet to the top and vice versa so they are baked evenly. Also use a lighter cooking sheet!

I'm not a huge pumpkin person, but Madi is and he loved them (not to mention they're butter free and contain no eggs), and I brougt them in as a Telefund experiment and a lot of people liked them! But if pumpkin is not your cup of tea, don't make them. Because they're pumpkin. I want to try a couple of other fall themed recipes, and will post if I decide to make them! Let me know what you think. Do you have any fall recipes that you love to make or anything you've heard of and want to try? Let me know!

Thanks,
Olivia :)


Wednesday, September 17, 2014

Wifey Wednesday: Organization

Hey all! Sorry about not posting last week, this series will most likely be a once a month thing, since my schedule is just going to get crazier once I start working full time again. Anyways, I wanted  to share some tips on how to be successful in planning a wedding: organization. If you're terrible at deadlines or keeping things together and have some extra cash, hear me out: get a wedding planner. Luckily, I am super organized and will share with you my wedding timeline. Every magazine or article you read about weddings usually has a wedding timeline, it's pretty generic. But you have to make it fit to your engagement length. If your engagement, like mine, was more than a year, you have way more time to figure things out. If you have a super short engagement, six months or less, then you have to condense everything in that short amount of time. Here are some of my suggestions as far as timelines go:

1) Find your dress early. I got mine two weeks after we got engaged! While some may say that is crazy, and why do that, it really helped pull the vision for my day together and gave me the piece of mind knowing what kind of workouts I should be doing based on the dress type and such.

2) Pick your venue early. We had a specific date, because it was our dating anniversary and it fell exactly seven years later on a Saturday. It had meaning to us. But we also had a very particular venue want: inside with a water view in Central Florida. Not always easy to find both. So start early! Look up places online and read reviews. I cannot stress enough: GO VISIT IT IN PERSON. You could see pictures of a wedding and say "wow this looks so nice!" but it was a wedding of 50 and you have 200+ people coming to your big day.

3) Don't stress about your dress accessories too soon.  I've met so many brides who find their dress and then FREAK out because they can't find the right shoes and buy an overprices pair of shoes and necklace because they don't want to miss out on the opportunity and then find a better pair later on, but it is too late to return the other shoes. Don't be that girl. I found my shoes six months after my dress on etsy and waited for a good deal before I bought them.

4) Hair and makeup places book FAST. On my timeline I had looking at hair and makeup places about six months before the wedding. Well a lot of them book way before that, so consider looking into it sooner if you are using someone for hair and makeup. Luckily I have friends who are awesome at hair and who are awesome at makeup, so I am using them.

5) Pick your photographer early and reasearch them well. Our venue had a list of "preferred" photographers that we basically had to use, so we had plans to meet up with one, then he took himself off the list and hated on the venue when calling to let us know. Not cool, glad we didn't go with him. Then we found an awesome couple who do work together for a GOOD price. But we signed with them about 13 months before our wedding.


So if you have a short engagement: find your dress, book your venue, then pick your photographer ASAP.

That's all for now. Keep telling me what you want to read about wedding or wifey wise :)

Thanks,
Olivia :)

Wednesday, September 3, 2014

Wifey Wednesday: DIY Save the Dates

Hey everyone!

So I am very excited to share with you all my Save the Dates and how I put them together. For those of you personally attending the wedding, you have already seen them or will be seeing them in the mail very soon! I wanted to show you what I did and how you can add simple touches to make your Save the Dates more personal. The front and back of my Save the Dates are on the right. The scoreboard and basketball theme was the one thing Madi wanted to do, so I went with his wishes. When we took our engagement pictures, our orignal plan was to do a bunch with the basketball, but due to lighting, and Madi forgetting the ball at home for the second half of pictures, we only had two pictures that looked normal with the basketball, but our faces looked super bright so we came up with this design on the right.
In order to make the scoreboard with the date we wanted it was a little more complicated than I had anticipated. I thought there would be a fake scoreboard generator, but no such luck. (If you know of one let me know!) So I googled scoreboards and found a website with the grey background and had to copy and paste the same color numbers into Paint to create the scoreboard with our actual date on it. Yeah super complicated for real. The rest was done through PicMonkey.com which is a photo editing site that I LOVE and reccommend to anyone. It's free for basic things, and has updgrades for premium paying users. I use it for the basic editing and collage making. I guestimated on the size of the Save the Date and then went to Vistaprint to make the magic happen.
Vistaprint has the option to upload your own design, and so I adjusted the Save the Date to the correct size on PicMonkey which took a couple of tries before I got it the same size, and then uploaded it making sure it wasn't cropped in any weird places and that everything was centered.
For the back I tried to get the size of the Save the Date on Paint and pasted the color blue of our wedding then uploaded the blank blue jpg file to Vistaprint and added the font with text boxes so I could change the colors. Each individual line was a different textbox so I could adjust the size accordingly.
TIP: when you are making your back piece (if you decide to do it this way) make sure the whole image is very large so it doesn't look pixelated on the actual Save the Date card (mine did a little bit and it bothers me so just a heads up!)
I also decided to spice them up a little bit by buying grey envelopes off of Invitation Outlet since that is our second color, and got them for a pretty good price and then bought these adorable Save the Date stickers off the shop called Nice Package Design. They were a little pricey, but overall super cute and I think they added a little something to the presentation of the envelope.

So that's how I did it! Doing my Save the Dates myself saved me A LOT of money and I think they turned out awesome and had such a personal touch. What do you think? I am so excited to keep sharing more of our projects and experiences on the new Wifey Wednesday series. Hope you all had a fabulous Labor Day weekend!

Thanks for keeping up,
Olivia :)